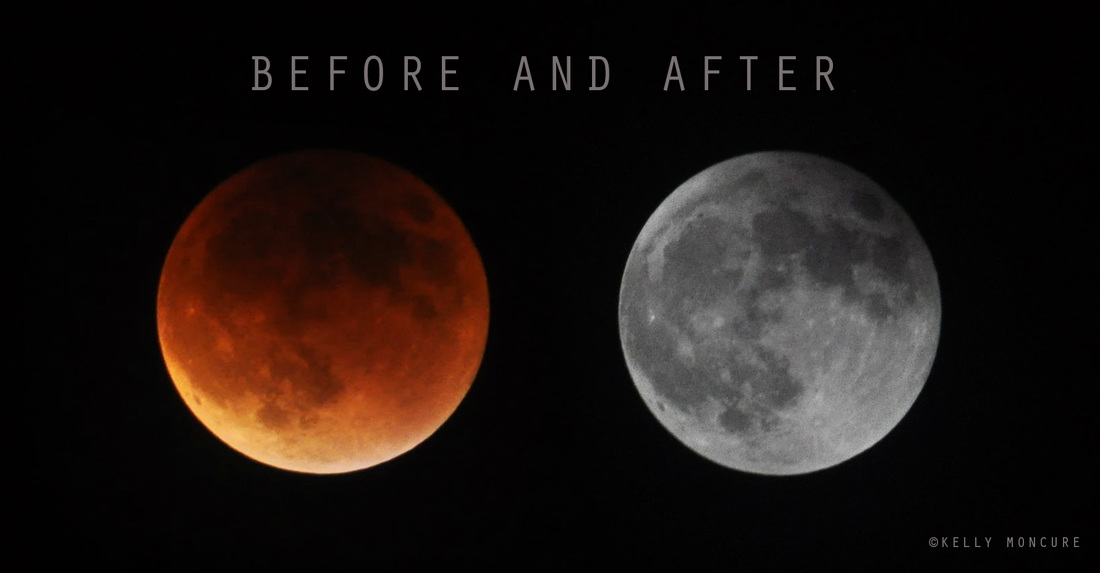
 Blood Moon Lunar Eclipse, September 27, 2015. Left image: 70-300mm lens @ 270mm, ISO 1000, aperture f/5.3, shutter speed 1.3 secs. Right image: 70-300mm lens @ 300mm, ISO 800, aperture f/13, shutter speed 1/1250 sec.
To photograph the moon: 1. Use a tripod! A flat surface will only allow you to shoot straight, and shooting the moon means that you'll be shooting up and constantly re-adjusting the tripod as the moon moves throughout the night.2. Use a shutter release cord, remote or the camera's self timer if you don't have one, so that you don't move the camera when pressing the shutter release during a long exposure. 3. Use a zoom lens and zoom in as much as you can to the moon. It's okay if it's not a super fancy lens, this was shot using a 15 year old $100 lens. Focus in on the craters and details on the moon. 4. ISO 1250- 1600, so that you can use as fast a shutter speed as you can without losing detail-the longer the shutter speed, the more chances you have the camera will shake even slightly in the wind, resulting in an out of focus photograph. 5. Aperture priority of f/5.6 since you are not worried about capturing any details other then the moon. 6. Bracket your exposure, meaning over expose and underexpose the photograph from what the camera is telling you. Generally the camera will overexpose the moon, so you'll get nothing but a white blob in the sky. Use the exposure compensation button (the +/- button below the shutter release) and change the exposure to -0.5, then -1.0, then -1.5 and so on, until you start seeing detail in the moon. You may go as far as -5.0 exposure compensation to get what you need. 7. Take a fair amount of photos and keep refocusing as the night progresses. The photographs may look focused on the camera's display, but you won't really see if they're completely in focus until you upload them onto your computer screen.
0 Comments
 ISO 400 - Aperture f/8 - Shutter Speed 1/1,000  ISO 400 - Aperture f/8 - Shutter Speed 1/1,000  Balance - ISO 400 - Aperture f/8 - Shutter Speed 1/2,500 Balance is depicted in the symmetry of the trees in the image. The two palm trees are the same height and look very similar in size, color, etc. The subject is balanced, symmetrical, and focused in the center of the image, which contribute to the success of the depiction of balance. 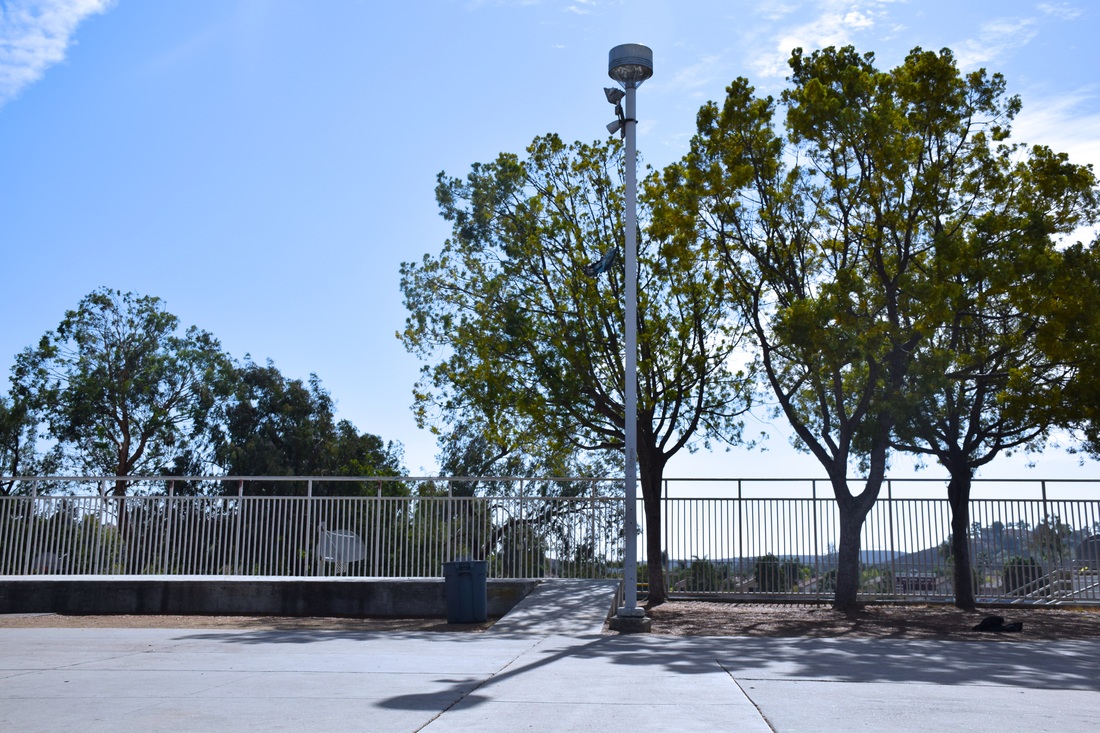 Proportion - ISO 400 - Aperture f/8 - Shutter Speed 1/2,000 Proportion is shown through the comparison of height between the trash can and the light post. The varying scale of the two objects provides a good sense of proportion, in which the light post towers over the trash can. The light post is positioned slightly closer to the camera, which adds to its height over the trash can. 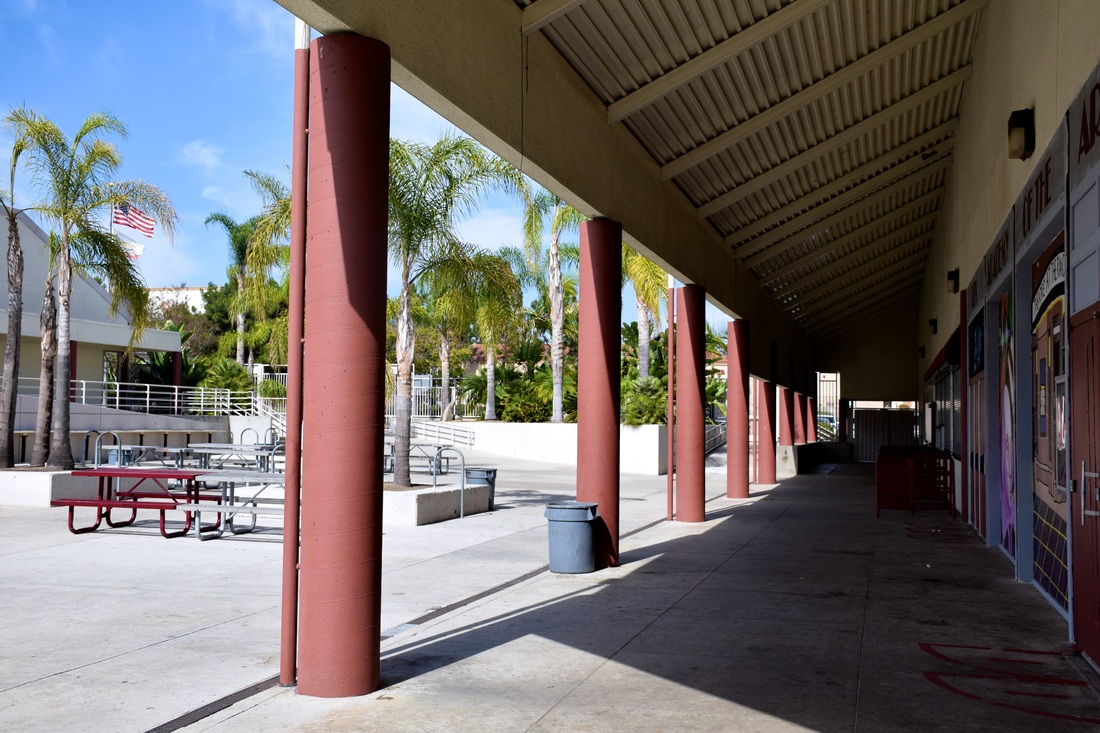 Rhythm - ISO 400 - Aperture f/8 - Shutter Speed 1/1,250 The repetition of the the beams creates rhythm in the image. The beams are equally separated, continuing all the way down the hall. Rhythm is present in the continuation of the beams, in which the multiple beams create a sense of depth.  Emphasis - ISO 40 - Aperture f/2.2 - Shutter Speed 1/30 - iPhone Camera Used The principle of emphasis is clearly displayed in the photograph. The succulent is the main focal point of the image, in which its purple hue and unique geometric pattern catches the eye against the neutral background. The principle of emphasis is successful because it focuses on a single, unique subject that draws the viewer's eye. 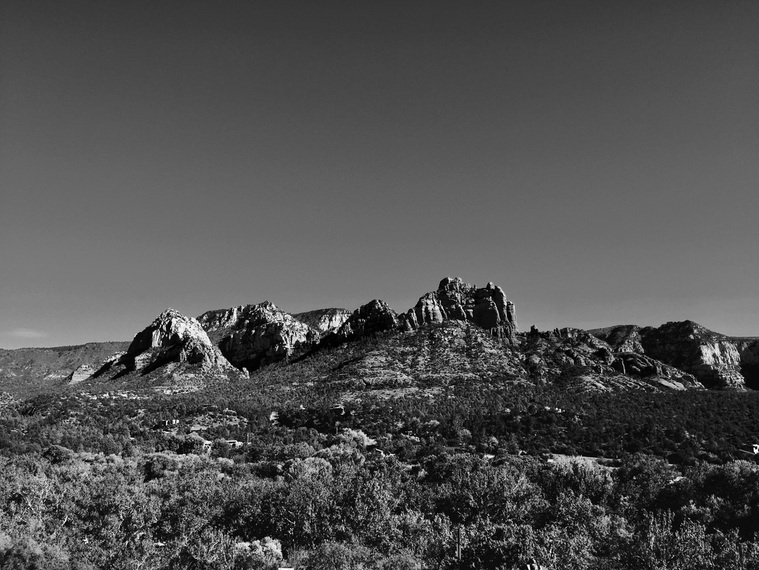 Harmony - ISO 32 - Aperture f/2.2 - Shutter Speed 1/1276 - iPhone Camera Used The photograph displays the principle of harmony. The image is of the red rocks in Sedona, Arizona. The principle of harmony is present, in which the color and subjects of the image are harmonious and come together to make a pleasant image. 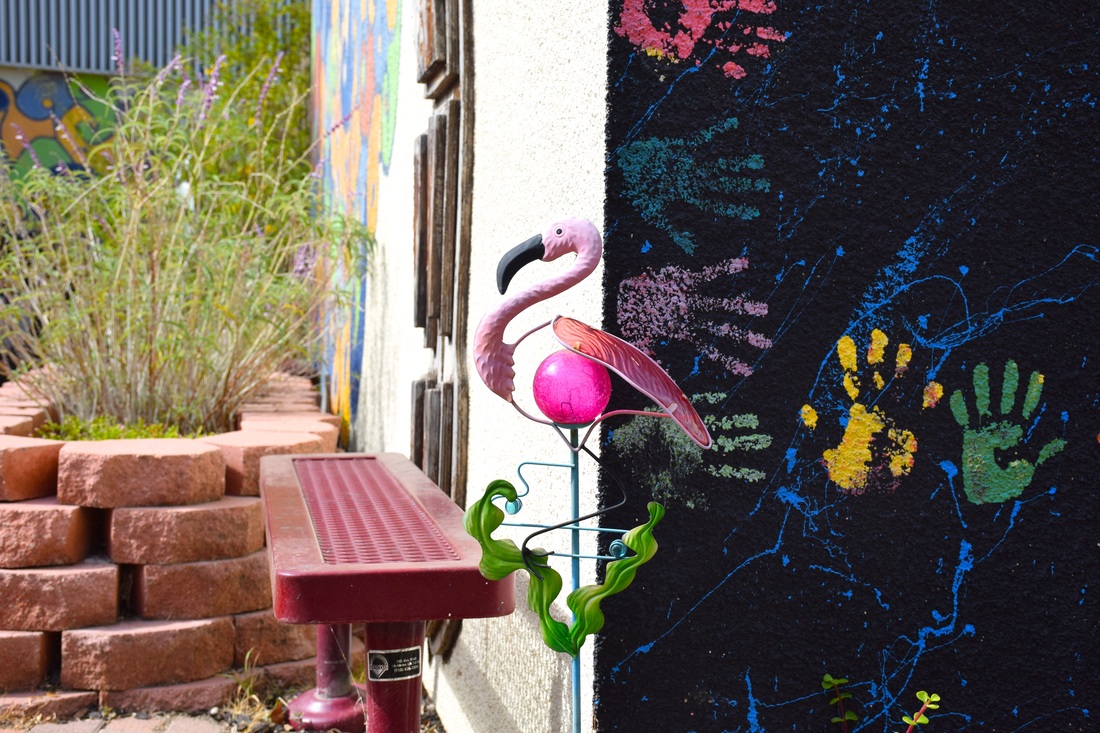 Variety - ISO 400 - Aperture f/8 - Shutter Speed 1/800 The photo displays the principle of variety. The flamingo statue, the mural, and plants in the background all contribute to variety, in which there are multiple contrasting elements in the image. The flamingo statue in particular is an unexpected element in the RBV garden, which displays the principle of variety. 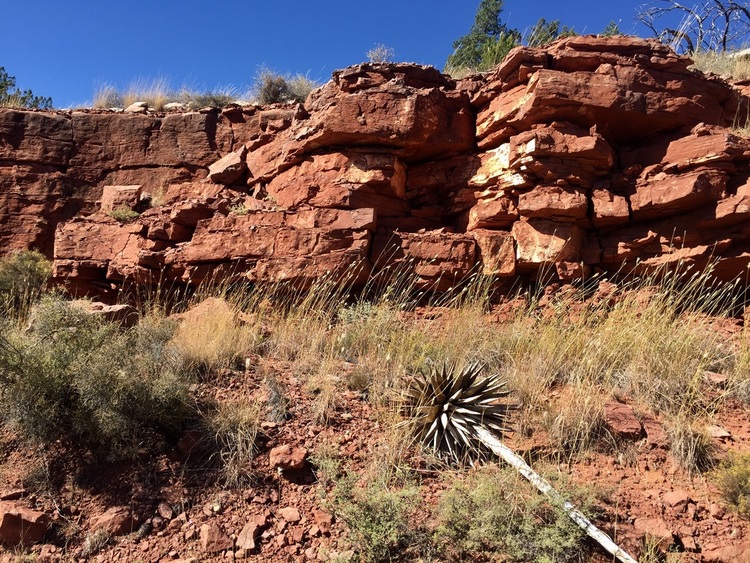 Unity - ISO 32 - Aperture f/2.2 - Shutter Speed 1/920 - iPhone Camera Used The image is an example of unity. The dominant color is the adobe reddish/ brown, seen in the rocks and ground. The image is tied together with the dried brush and fallen plant. Everything looks like it belongs, and comes together to create a solid, unified image.
 Line - ISO 400 - Aperture f/8 - Shutter Speed 1/500 This photo depicts the element, line. The fence that runs across the entire image is a straight, defining line that contrasts with the flowing branches/ leaves on the tree. The lines of the fence lead the eye across the image. 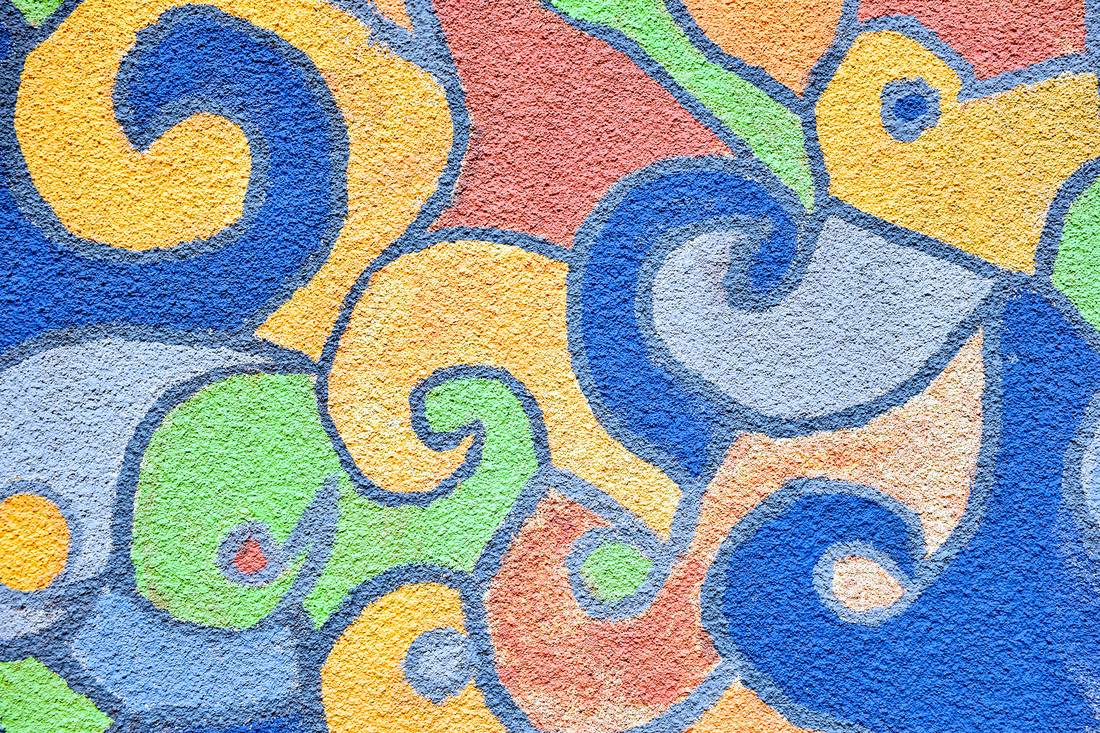 Color - ISO 400 - Aperture f/8 - Shutter Speed 1/1,600 The image is an example of color, in which there are various colors, such as blue, green, orange, red used in the mural. The mural has many bold, bright colors that draws the viewer's attention. The combination of both warm and cool colors create contrast in the image. 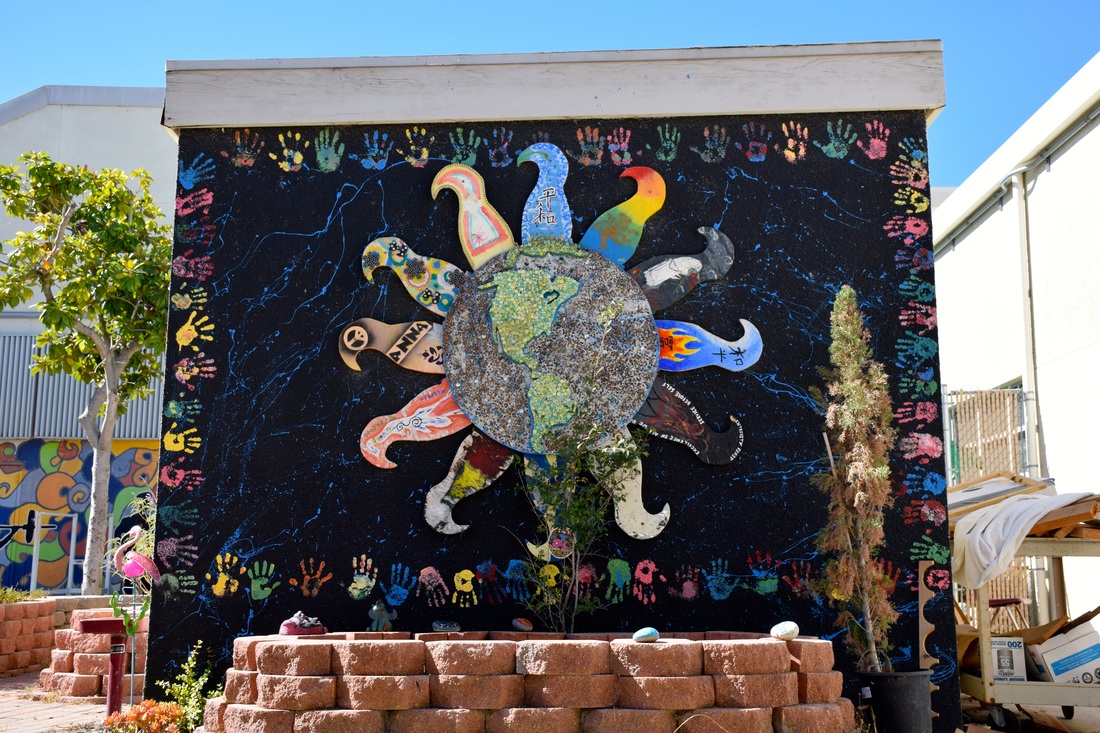 Shape - ISO 400 - Aperture f/8 - Shutter Speed 1/640 The sun sculpture in the image is an example of shape. The sculpture has a dominant circle in the center with surrounding sun rays, which are uniquely shaped. The unique shape of the sun sculpture catches the viewer's eye and is an interesting piece. 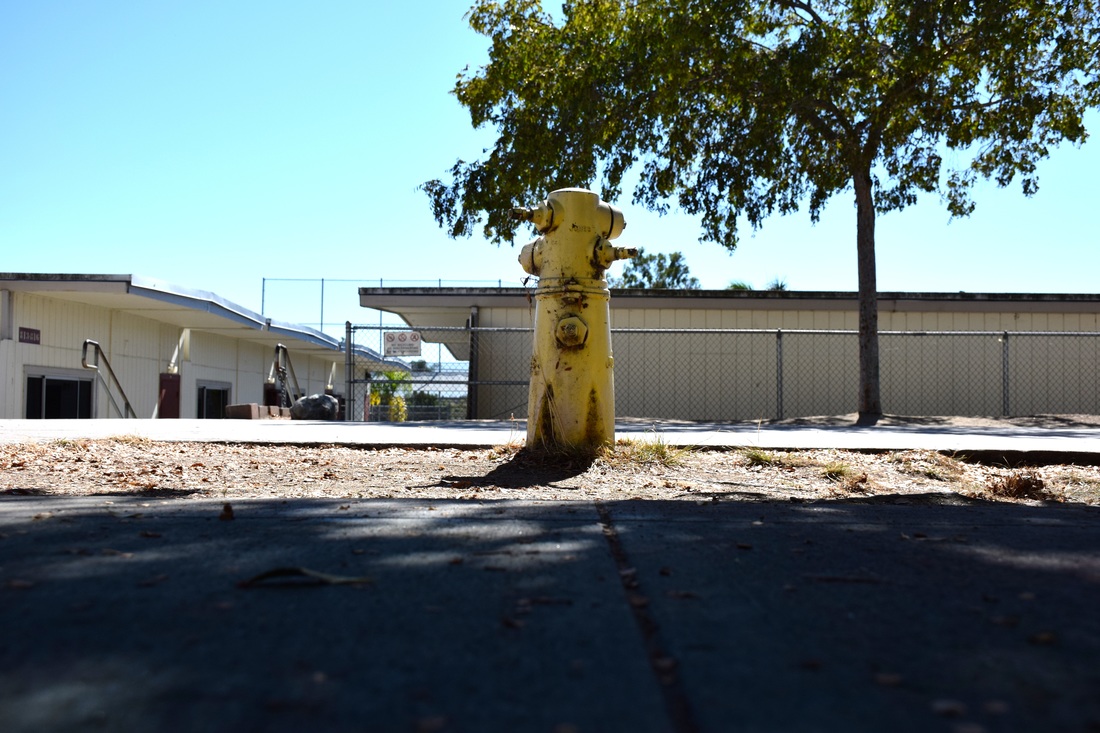 Form - ISO 400 - Aperture f/8 - Shutter Speed 1/1,250 The fire hydrant is an example of form, in which it is a three dimensional object with height, width, and depth. The image also displays several shadows, of both the fire hydrant and the tree. The fire hydrant is the main focus of the image, and its three dimension catches the viewer's eye. 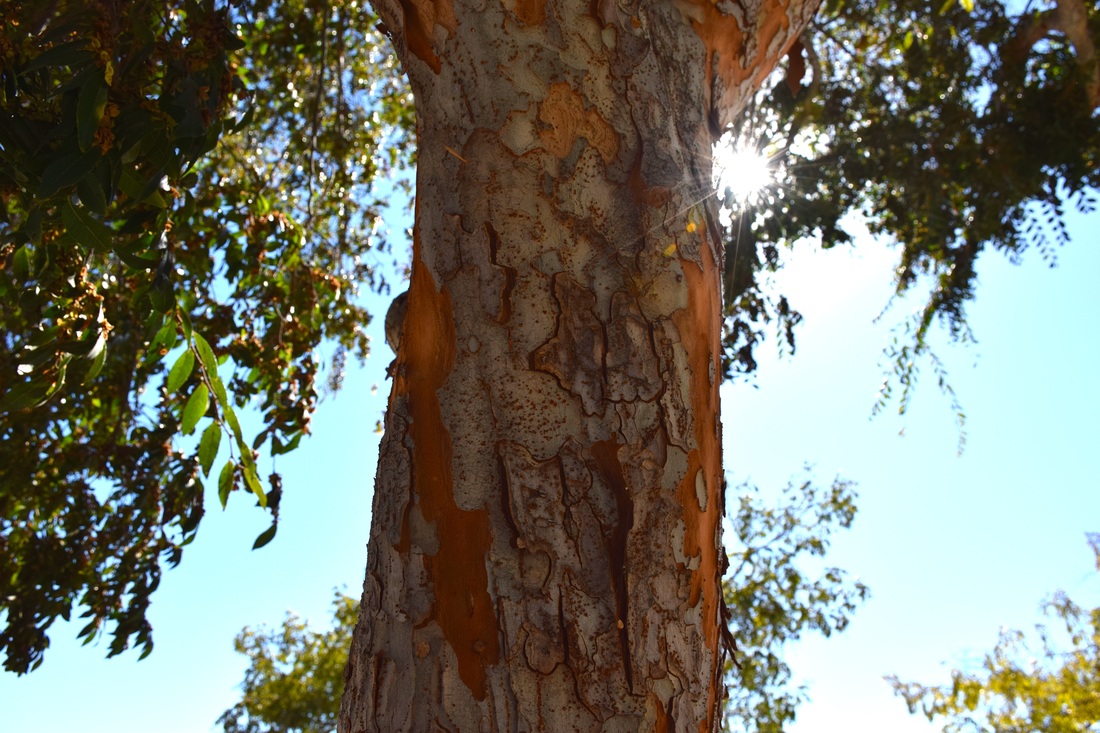 Texture - ISO 400 - Aperture f/8 - Shutter Speed 1/1,250 The image displays texture. The rough, partially broken off bark of the tree displays the element of texture. It is as if you can reach out and feel the rough texture of the bark. 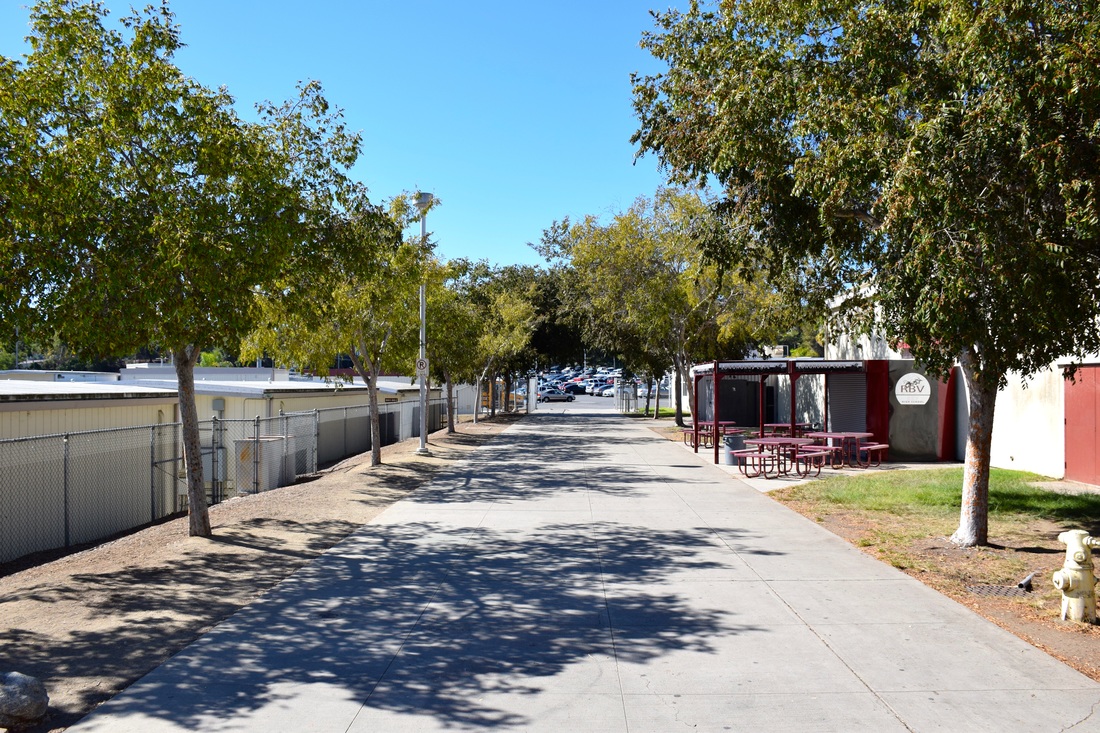 Space - ISO 400 - Aperture f/8 - Shutter Speed 1/800 Space can be observed in the image through the feeling of depth. The narrowing appearance of the sidewalk and trees help to create the feeling of depth. Space is seen in the wide open space of the walkway. 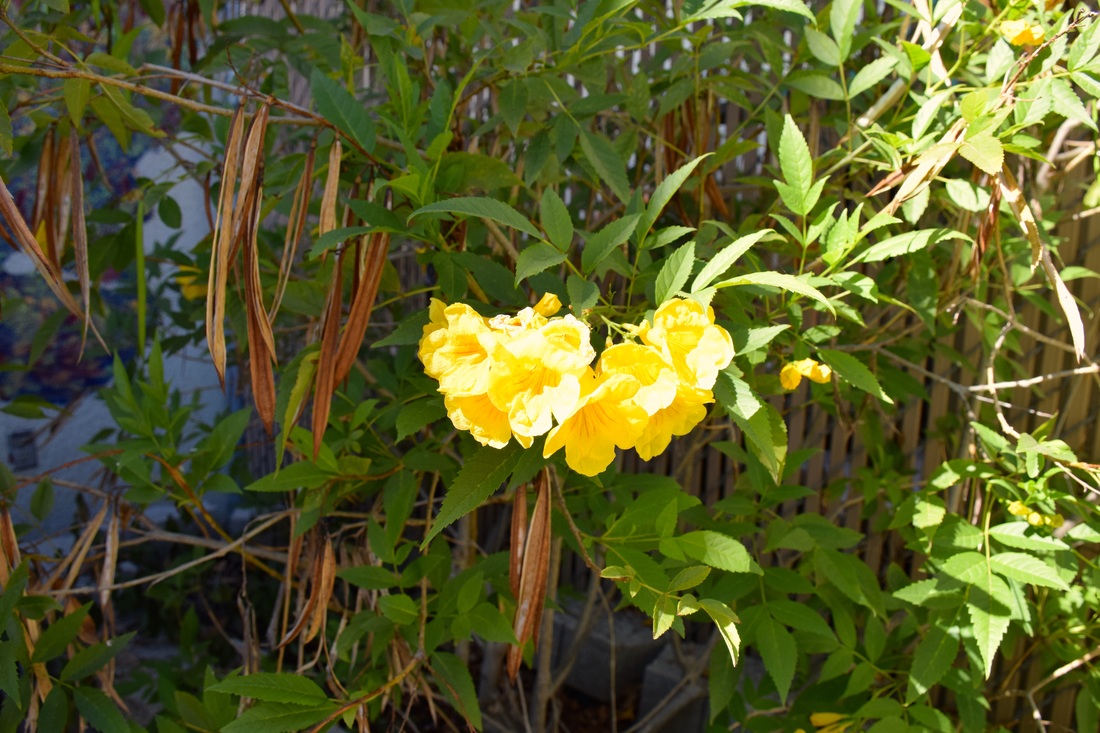 Value - ISO 400 - Aperture f/8 - Shutter Speed 1/320 Value is seen in the brightness and color of the image. The sunlight highlights the flower, making it brighter. The flower is a warm, summery yellow, accentuated by the natural light. The bright yellow pops against the green leaves and the rather dark and shaded background.
Element of Art*The “building block” of design *All good design will have one or more of these elements; line, color, shape, form, texture, space, and value Line *A line is one-dimensional and can vary in width, length, and direction. Lines also can define the edges of a form. Lines can be horizontal, vertical, or diagonal, straight or curved, thick or thin. Lines lead your eye around the composition. -Line is present in the border on the wall, which divides the wall into two halves (top part is light while bottom part is darker in color). The defined, straight line draws the viewer's eyes to the image, in which it is a sharp contrast to the other objects on the wall/ podium, which are uniquely shaped. 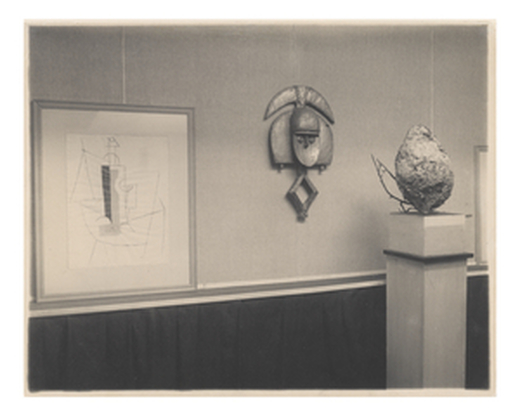 Alfred Stieglitz - "The Picasso-Braque-African Carving" - 1915 http://www.getty.edu/art/collection/artists/1815/alfred-stieglitz-american-1864-1946/ Color*Color has three main characteristics: hue (red, yellow, green), value (how light or dark it is), and intensity (how bright or dull it is). Colors can also be described as warm (red, yellow), or cool (blue, green). *Furthermore, Monochromatic - one color plus its tints (adding white) and shades (adding black). *Complimentary Colors- colors opposite each other on the color wheel. (ex. Green & Red). *Analogous Colors- colors next to each other on the color wheel (ex. Red and orange). - In Skoglund's image, Hangers, there is a clear representation of color. It is seen through the warm and bright yellow tones on the walls, the man's clothes, chairs, and other objects. The hangers and floor add a pop of color, in which the grey and pink contrast from the dominant yellow color throughout the image. The bold colors add to the peculiarity of the image and add a fun aspect to it. 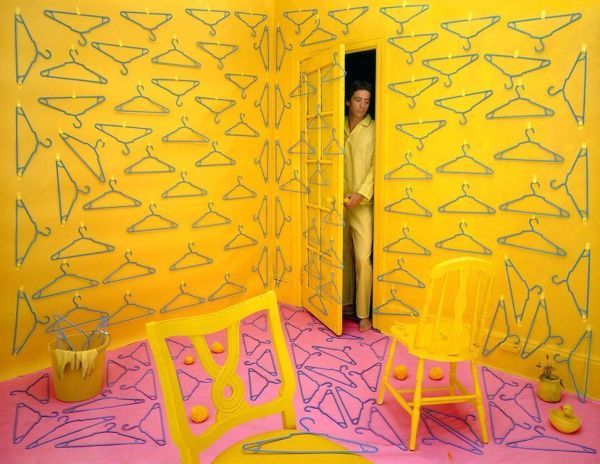 Sandy Skoglund - Hangers - 1979 - http://www.sandyskoglund.com  ISO 1600 - Aperture f/9.5 - Shutter Speed 1/1000 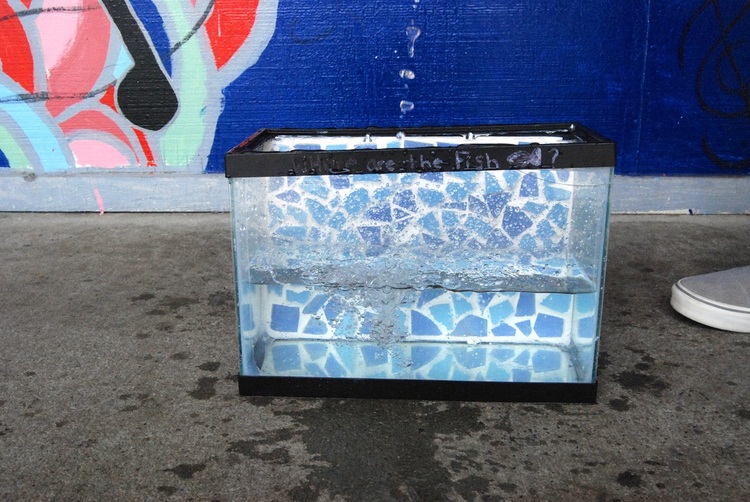 ISO 1600 - Aperture f/11 - 1/1000  ISO 1600 - Aperture f/8 - Shutter Speed 1/1000 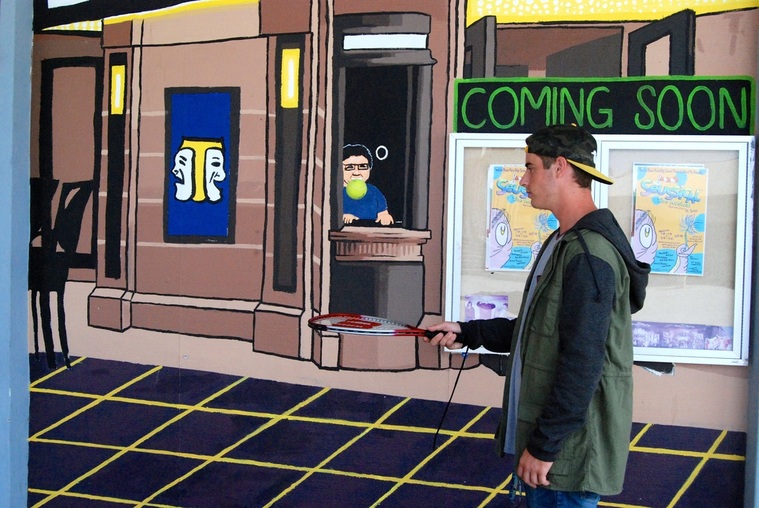 ISO 1600 - Aperture f/8 - Shutter Speed 1/1000 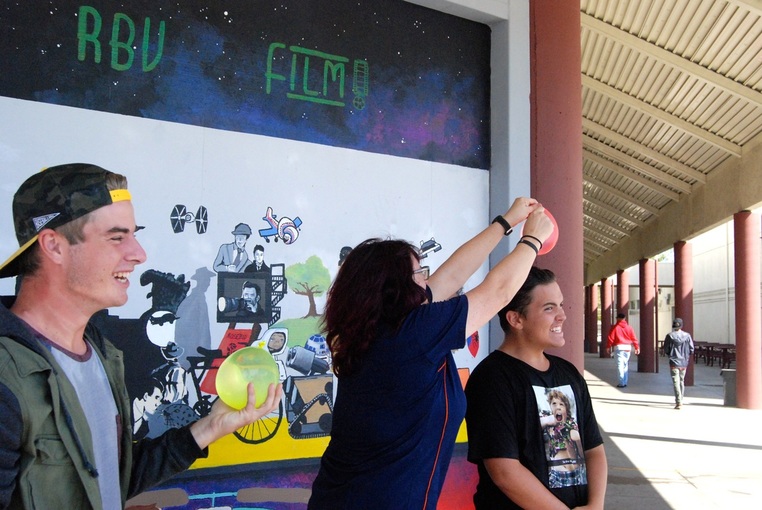 ISO 1600 - Aperture f/8 - Shutter Speed 1/1000 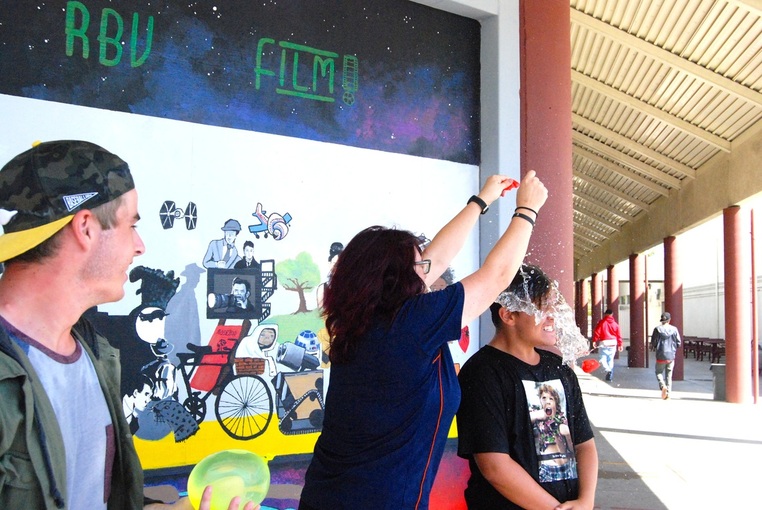 ISO 1600 - Aperture f/8 - Shutter Speed 1/1000  ISO 1600 - Aperture f/16 - Shutter Speed 1/1000 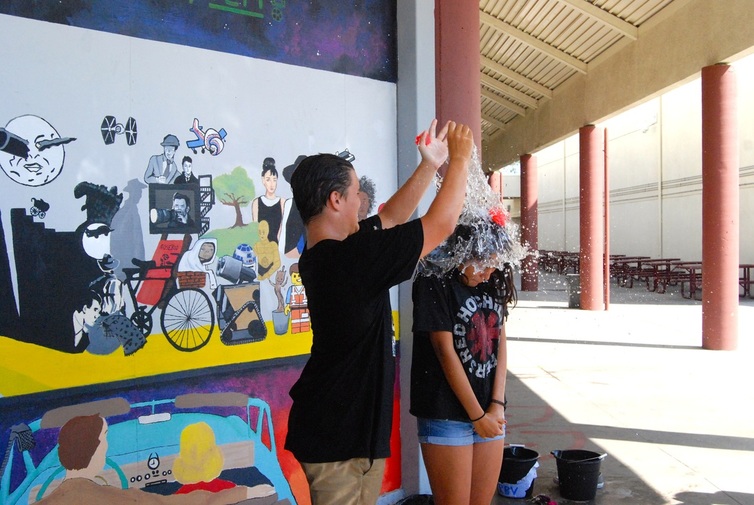 ISO 1600 - Aperture f/8 - Shutter Speed 1/1000 1. The camera was set to Shutter Speed priority, which allowed for the rapid action/ movement to be captured
2. My group had slight difficulty creating the bubbles/ water stream effect in the water tank. We had to adjust by raising the height at which we poured the water in the tank, which created a more dramatic bubble effect that would more clearly appear in the picture. 3. I learned that shutter speed is very useful for capturing fast movement, timing is everything, and to get a great shot, you have to rapidly take a lot of pictures and hope that one captures the movement that you wanted. 4. Fast shutter speed is used to capture rapid movement as well as freeze a moving subject (for example, fast shutter speed will freeze a person jumping in air- creates a floating look) 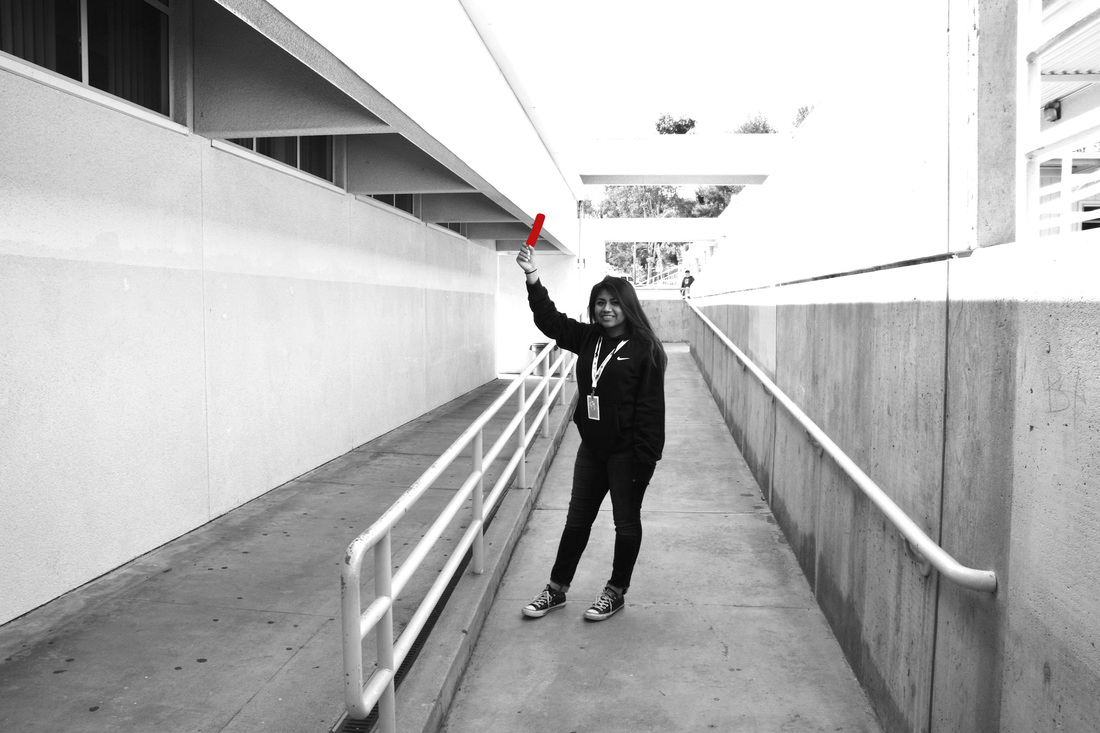 In the photograph, the subject is holding a high school diploma. The photo represents self-respect through receiving an education. The girl respects herself enough to acknowledge her potential and put forth effort to receive an education and set herself up for success in the future. Education is greatly valuable, in which it allows one to grow as a person and gain new skills and knowledge.
 ISO 100 - Aperture f/5.6 - Shutter Speed 6.0 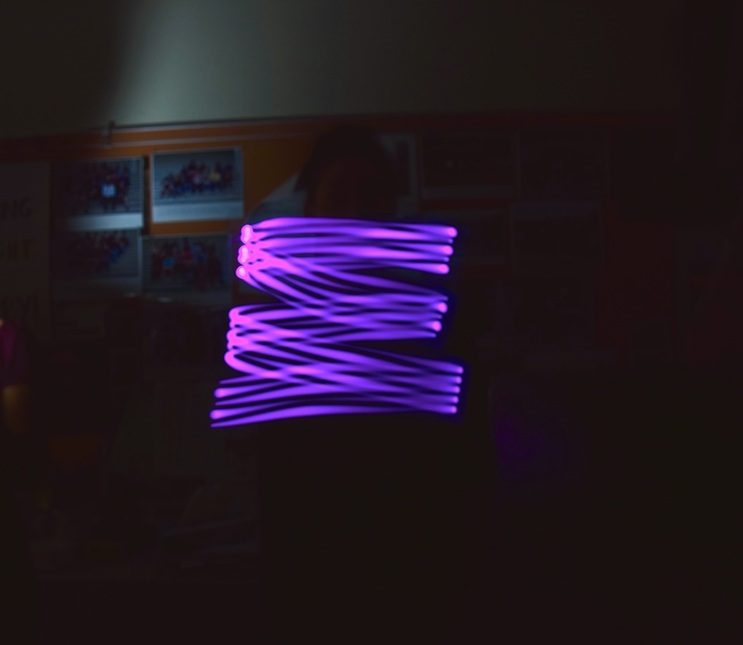 ISO 100 - Aperture f/5.6 - Shutter Speed 6.0  ISO 100 - Aperture f/5.6 - Shutter Speed 6.0 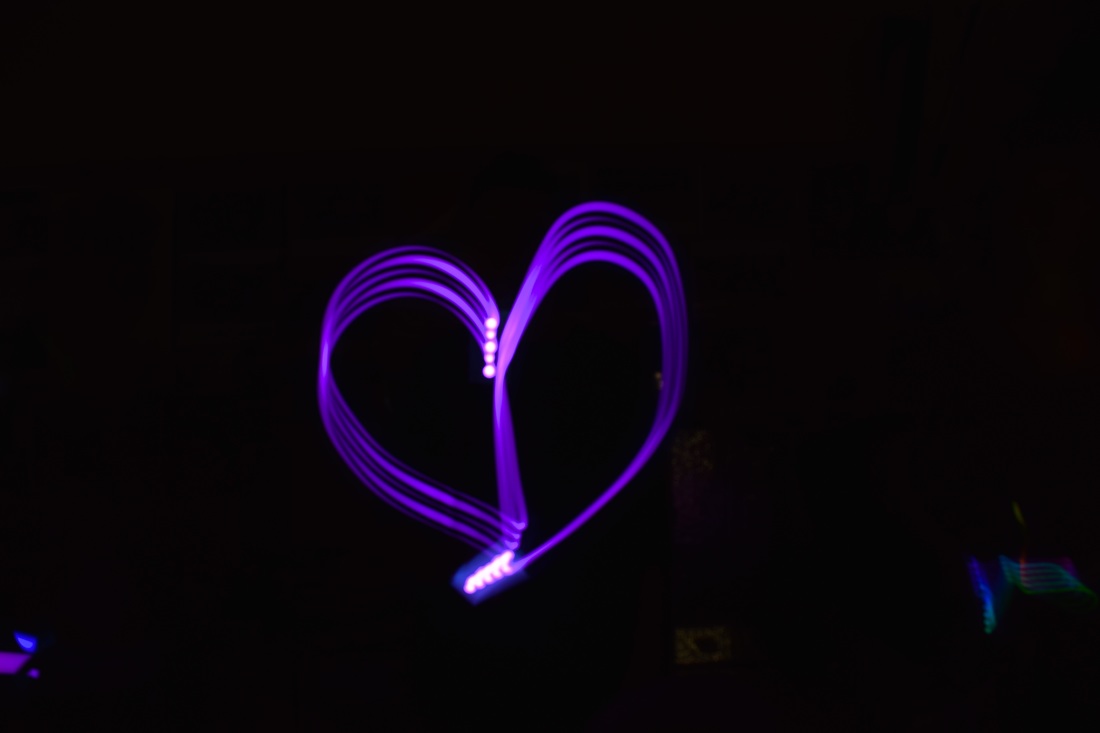 ISO 100 - Aperture f/5.6 - Shutter Speed 6.0 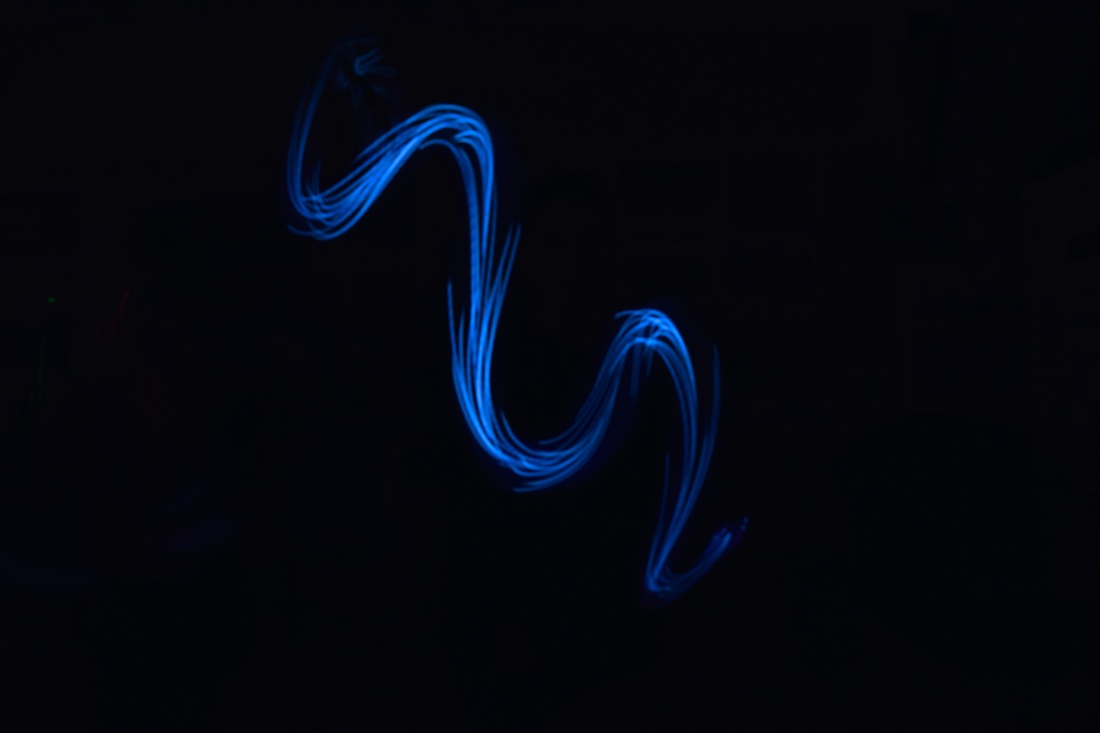 ISO 100 - Aperture f/5.6 - Shutter Speed 6.0 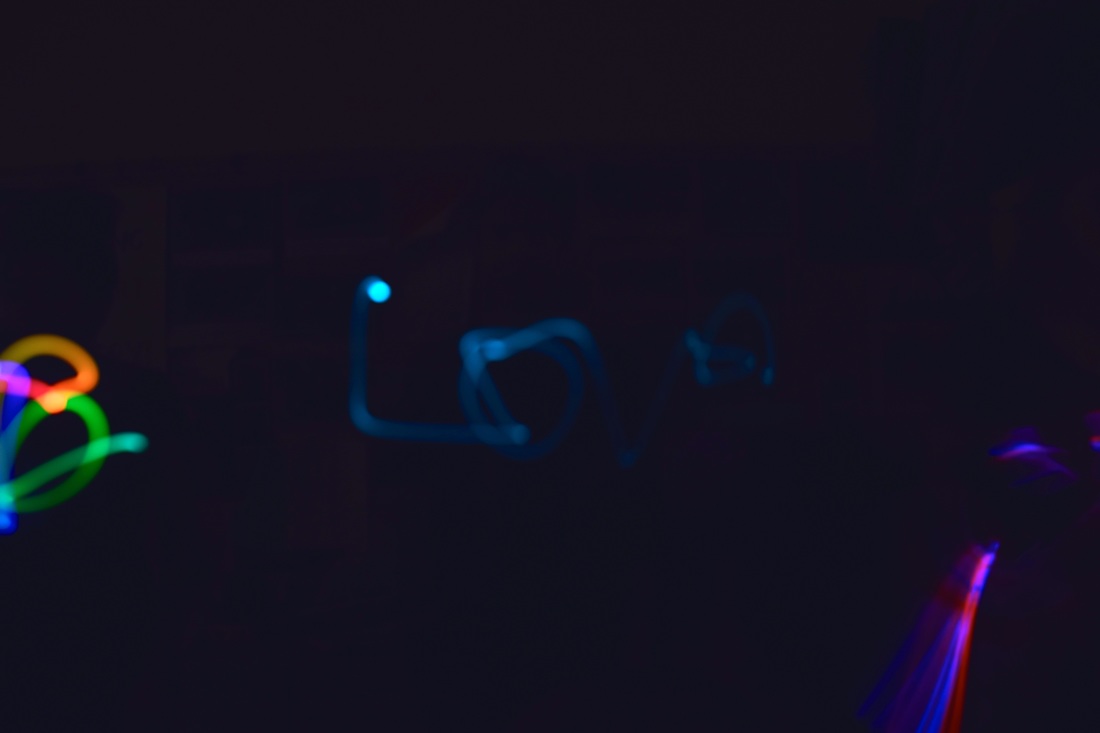 ISO 100 - Aperture f/5.6 - Shutter Speed 6.0 To achieve the 'light painting' effect, the room in which the photos were taken was completely darkened. The camera was placed on a tripod and set in manual mode with manual focus, My partner stood in front of the camera and created designs with a cellphone app. We used the app myLightPaint, which provided various colored lines/ dots/ shapes to create a light designs with.
 Aperture- f/16 ISO- 100 Shutter Speed-1/3 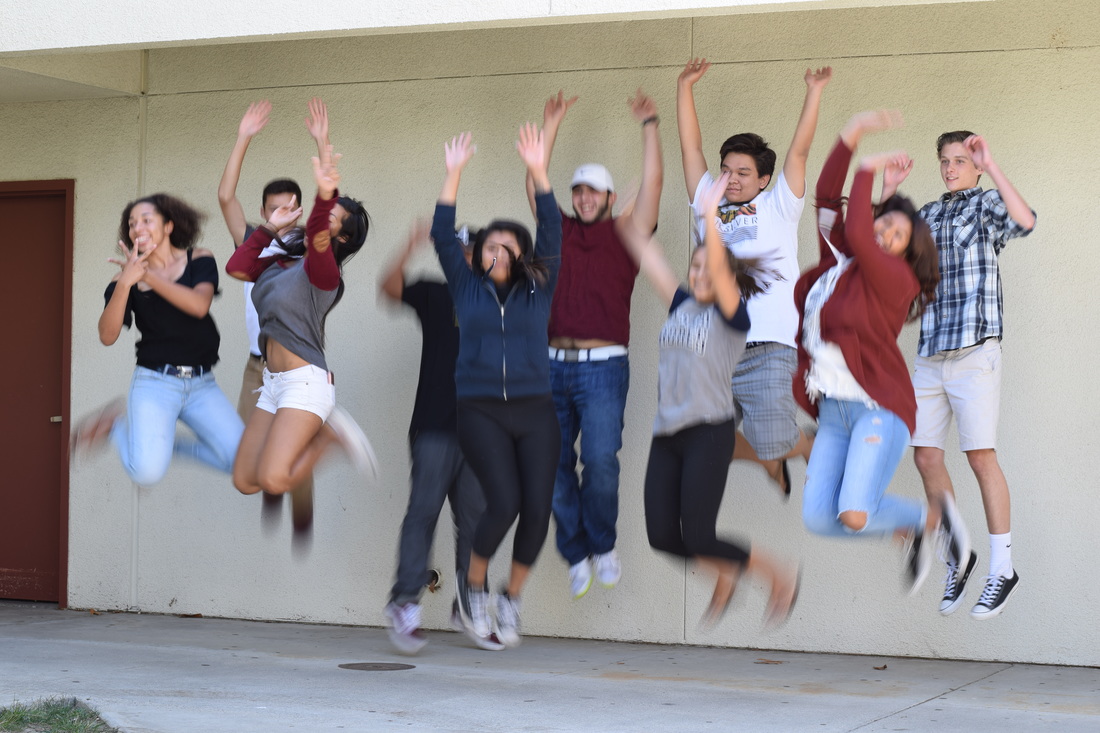 Aperture- f/8 ISO-100 Shutter Speed-1/30 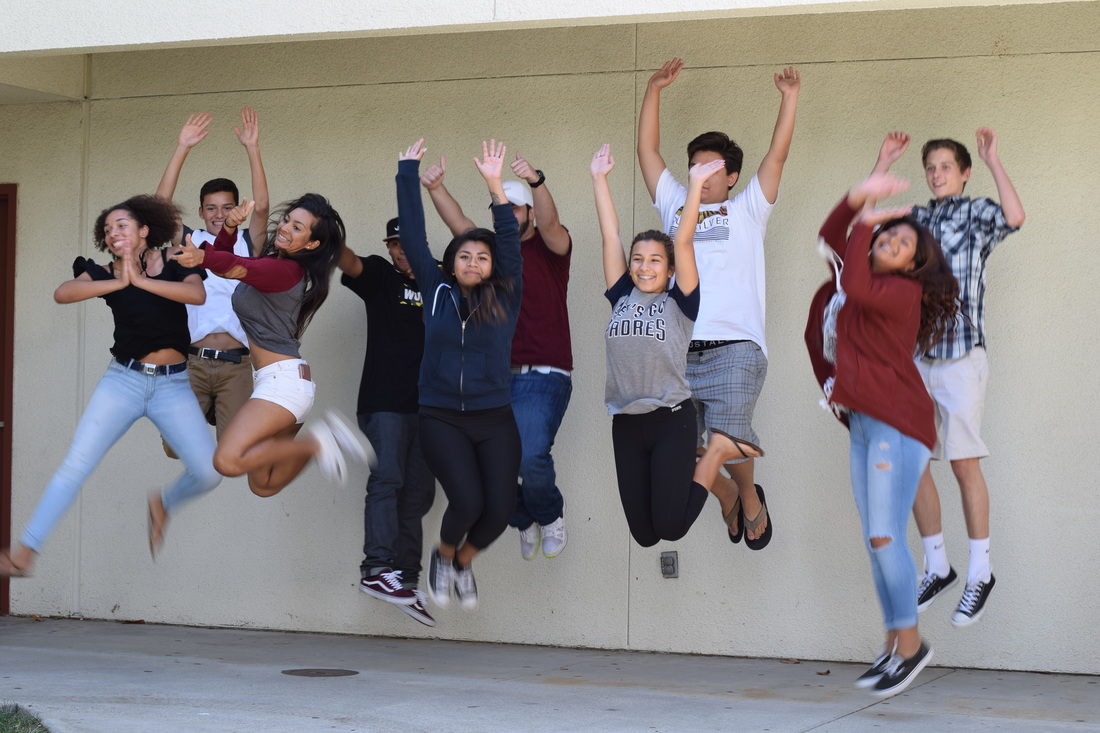 Aperture-f/6.3 ISO-100 Shutter Speed- 1/60  Aperture-f/2.8 ISO-100 Shutter Speed-1/250  Aperture-f/1.8 ISO-100 Shutter Speed-1/1,000 1. To change the camera to be in shutter priority, turn the mode dial to S (Shutter Speed). To change the shutter speed, slightly press on the shutter button and the display on the screen should appear. On the screen, you will see what shutter speed, ISO, and aperture the camera is set to. Using the rear dial, you are able to adjust the shutter speed as desired.
2. The faster the shutter speed, the more the subject(s) will appear to be frozen or suspended in air. The slower the shutter speed, the more the subject(s) will appear blurry - able to see motion in the picture. In the pictures taken, I see the images progressively getting more focused and the subjects become suspended in air. 3. Shutter speed can be incredibly useful in many situations. If a photographer wants to capture their subject frozen in mid-air, then a fast shutter speed is ideal ( i.e. 1/1,000) If a more blurred motion look is desired, use a slower shutter speed (i.e. 1/3) to get the blurred effect in the image. To get a smooth look in the image (such as on water), a slower shutter speed is also ideal. 4. Shutter Speed Notes *Shutter Speeds are both a technical and aesthetic choice a photographer needs to make before releasing the shutter. *The shutter inside your camera controls the duration of time the sensor is exposed to light. *Capturing blur or motion in your photograph can emphasize movement and add drama *A fast shutter speed is often utilized to freeze the movement of a subject *A slower shutter speed can be used to show motion and visualize movement *Shutter speeds are expressed as seconds or fractions of seconds (1/8000- 1/4000- 1/2000- 1/1000- 1/500- 1/250) *As a general rule to prevent unintentional camera shake you should avoid handholding your digital cameras at shutter speeds slower than 1/ 2 x Focal length Example: When using a 200mm lens avoid using shutter speed slower than 1/400 *Using a tripod can help eliminate camera shake when using slower shutter speed *The visual blur and suggestion of movement occurs because the subject is moving against a static background *Layering motion of different subjects moving different directions at different speeds can set up interesting dynamics within a photograph *Fast shutter speeds can make normal subjects appear to freeze in the air *When photographing people running relatively close to the camera, a shutter speed of 1/1000 of a second or faster should freeze most motion *The distance the subject is from the camera, the speed of the subject, and the focal length of the lens will affect whether the subject is sharp or blurred *Slower shutter speeds can help convey the idea of motion and movement *Slow shutter speeds combined with panning can help isolate the subject form a busy and distracting background *A tripod combined with a long exposure can capture the fireworks’ trails *Water movement can be emphasized with long exposure 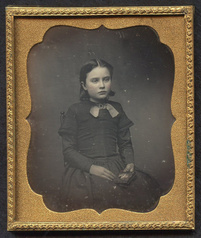 Daguerreotype *Is an early method of photography created by Louis-Jaques-Mandé Daguerre (1839) *The process of making a daguerreotype starts with a silver-plated copper plate. The plate is first buffed and polished until it resembles a mirror. The plate is then sensitized to light over iodine and bromine in specialized, light-proof boxes. *Is a negative and positive image at the same time *The images last a long time- 200 years+ and remain in pristiene condition *Allows for infinite detail
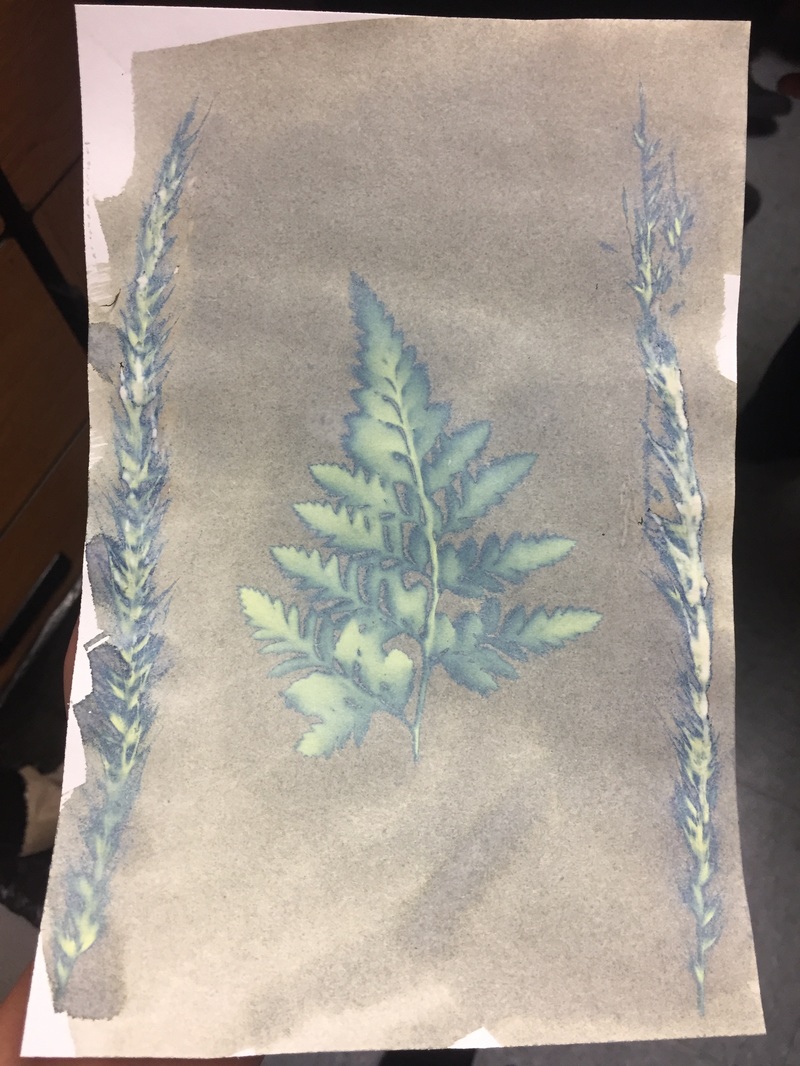
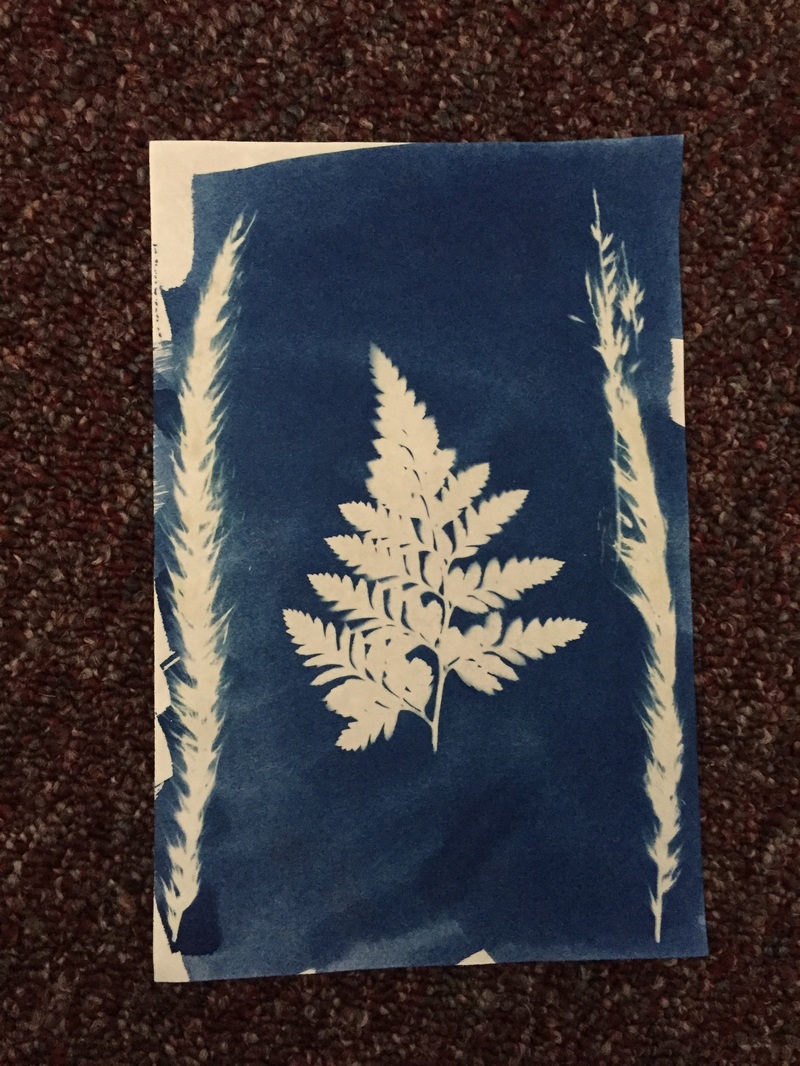
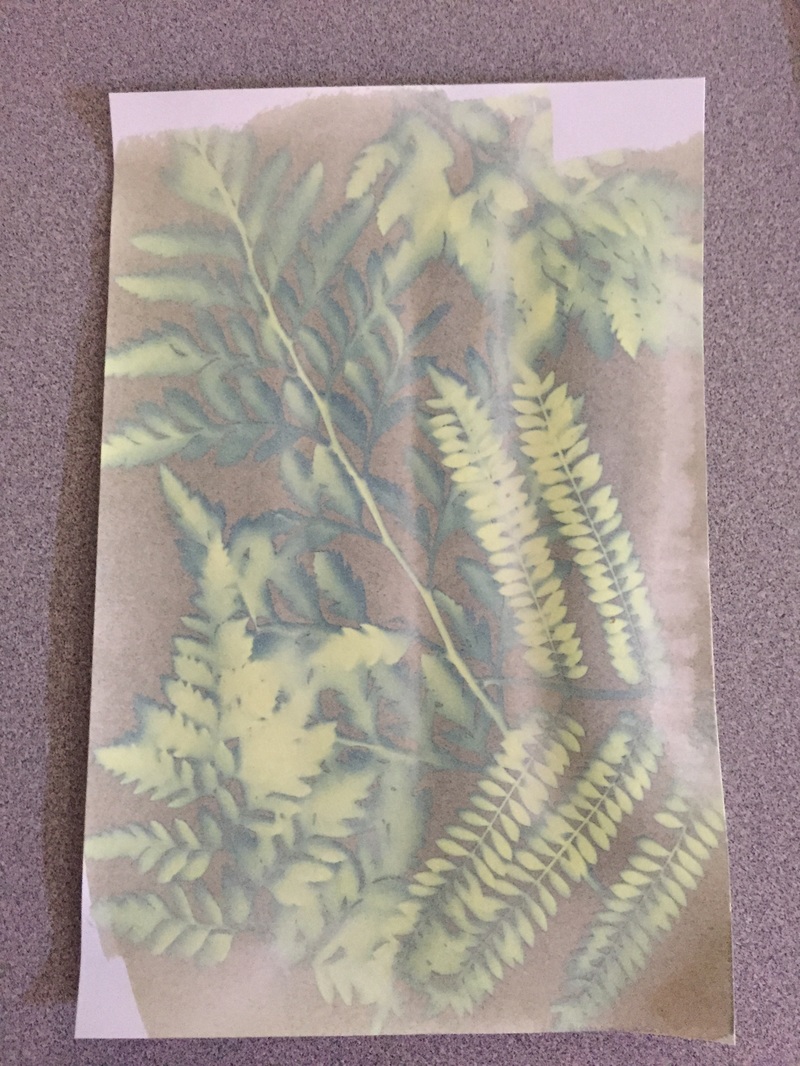
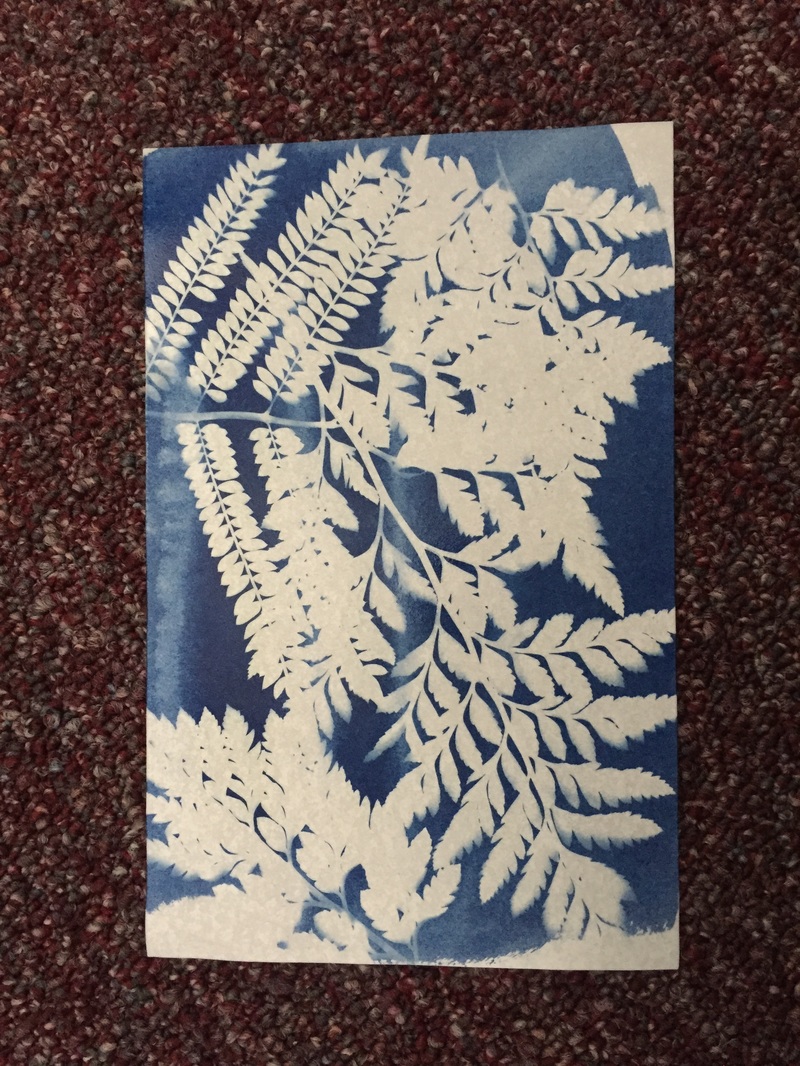
Cyanotype
*Is the photographic printing process that produces a cyan-blue print or image. (Created by Sir John Herschel- 1842) *Made from two types of salt: potassium ferricyanide and ferric ammonium citrate In a darkened room (no UV light) mix equal parts of solution A and B. The solution is now light sensitive and should be used immediately and stored in complete darkness. In the same darkened room, coat a piece of watercolor paper (90 pound works well) using a small paint brush and dry the paper using a hair dryer. The paper may be stored in a light-tight box for later use. Using the contact printing method expose the paper to full sun for 15-20 minutes. The yellow emulsion should turn to a steel blue grey color. Exposure times vary greatly depending upon the strength of the UV source and the density of the negative. Artificial light source rich in UV may be used with testing. Develop/ rise in water until stain clears. A few drops of 3% Hydrogen Peroxide may be added to the water solution to enhance the blue color Air dry to complete the cyanotype. *Non silver process is unique to the time period, most other photography processes are silver based. *Commonly known as the "blue print". |
AuthorArchives
June 2017
Categories |
 RSS Feed
Photo used under Creative Commons from Jori Samonen
